
I want to list a couple of key points that I learned and want to write down for myself to remember.
So basically you trace the full size black and white full size image (the size the quilt will be)
only the basic lines and features are traced - DO NOT pay attention to shading, light and dark areas like in the usual way of fusing (McKenna Ryan type designs) the shading and color is done only with the fabric.
After the basic shapes are drawn on the tracing you draw lines to form the feel or the flow of the image, how it will be divided up into different pieces that will blend together, remembering that you will have to applique these pieces so no evil points. the ying - yang type shape works best - incorporate that as much as you can.
 |
| see how these two shapes fit together nicely, with two different fabrics - the fabrics would blend and it would be easier to applique as well |
When drawing do not look at your hand or the pencil - look ahead to where you are going. When you drive a car you don't look at the steering wheel do you?
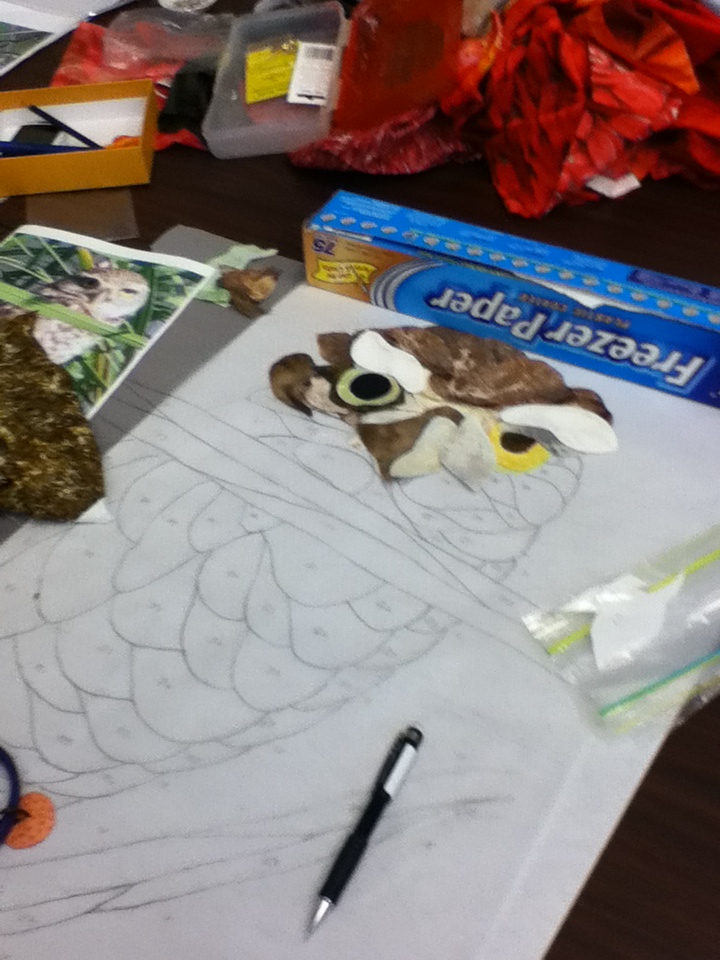
then you flip your tracing paper over after numbering all your pieces (I have 176!) and put freezer paper over it and trace and number all your pieces on freezer paper. You then cut out all the pieces, pick out just the right fabric for your piece and lay it back on the master pattern (your tracing paper). this process could take awhile, just sit back and enjoy it. It took me 10 hours just to get the llama - david said sometimes he takes a whole evening just getting a few pieces picked finding just the right fabric, placing the lights and darks of the fabric to get it in the right spot for the piece.

So on day two we spent most of the day picking out fabrics - hint - to pick out fabrics, pull all the fabrics you think might work and unfold them - throw them in a big pile. You need alot of fabric and you can't see how they blend or go together when they are all folded - play with and feel the pile. It may take you a half hour just to find the right shading or light and dark to put at the area you need. take your time and just let it happen - iron on the fabric to the freezer paper piece and set it down on the master pattern, if you don't like it just peel it off and try another. After awhile you will get more of a feel of what works and what doesn't.

you can see here how the different pieces are laid on the tracing paper. You have to turn under with an iron using starch on the edges but wait until you are happy with everything together in case you want to change a fabric or two. It helps at this point to put the pattern (which has a white paper behind it to see) on a foam board so you can stick pins in the pieces as in the above pic to keep them somewhat together in place.
So after all the pieces look good together, you simply (well not so simply :-) applique all the little pieces together working from the farthest part away from you first. Then quilt to add more dimension and shading and interest. here are some more photos of others progress in the class.


I love this cat! note the pile of fabric:-)

an iris

my mom's flower (she doesn't like it but I think it's great)

a chicken

and finally my 91 pieces done on my llama! now only 85 more to go on the background barn wood:-)

and lastly a couple of things he went over on how he quilts and binds his finished pieces.
- he uses only sulky blendables or superior thread for quilting - 50 weight. I asked about my favorite aurifill and he said it breaks and he doesn't like the color change length in the variegated
- he changes thread color for every different area of different color, so a lot of thread changing and knots and hides the thread in the back after every thread change
- after quilting the hell out of the piece, he hangs it on the design wall with T pins and irons it on the wall for blocking - iron and pull, iron and pull, iron and pull - until it lies completely flat with no wrinkles
- he puts poly twill bias tape (the stuff you buy at joannes) all along the edges - first top and bottom, then both sides - sews in right next to the edge
- then cuts a 2" binding ON THE BIAS - always on the bias because it has to go around so many layers including the twill tape.
- the reason for the twill tape is so that the quilt will retain it's shape better and lay flat better.
sorry if this was so long but I wanted this written out so that I could go back and refresh my memory in the future - that's the beauty of a blog:-)
You learned so much. Great work!
ReplyDelete